Adding elements in a form page is very straight forward. You click on the ADD NEW ELEMENT button and you are presented with a list of elements to choose from.
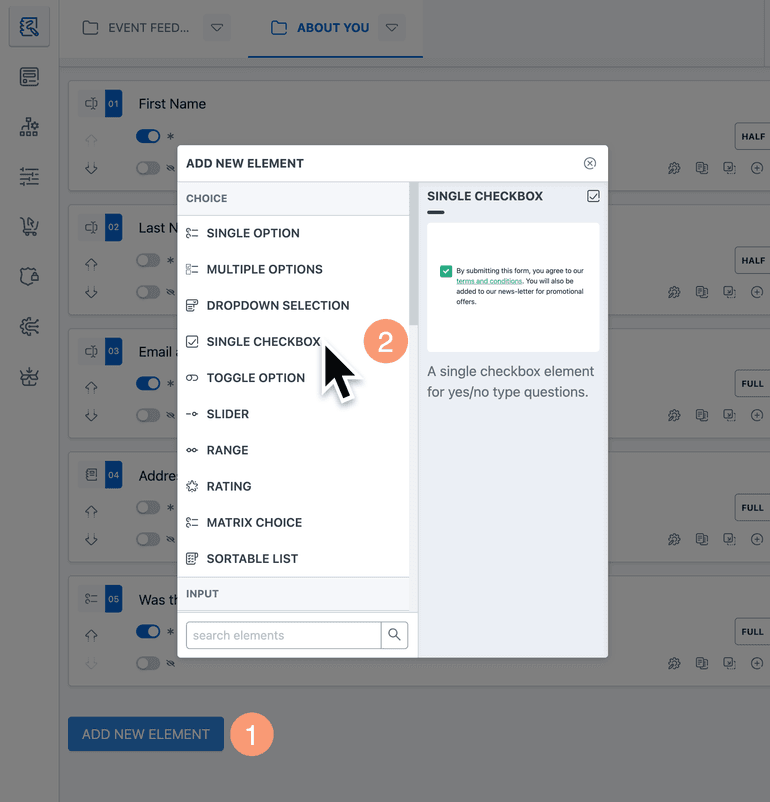
Select the element you want to add and it will added to the page.
Element Interface
The image below shows different parts of the element interface.
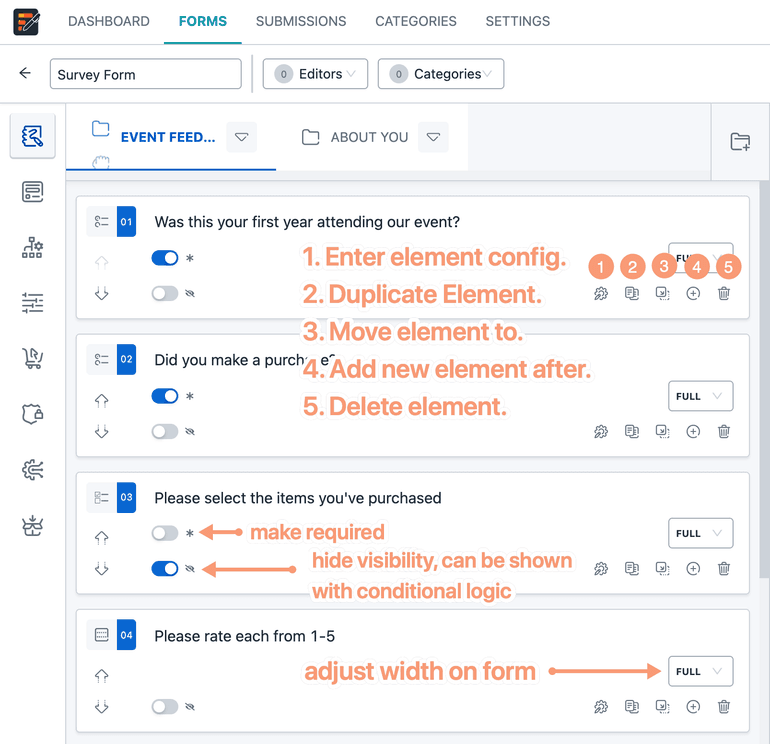
- Configuration: Click this button to enter the configuration window.
- Duplicate: Create a duplicate of this element and add after it.
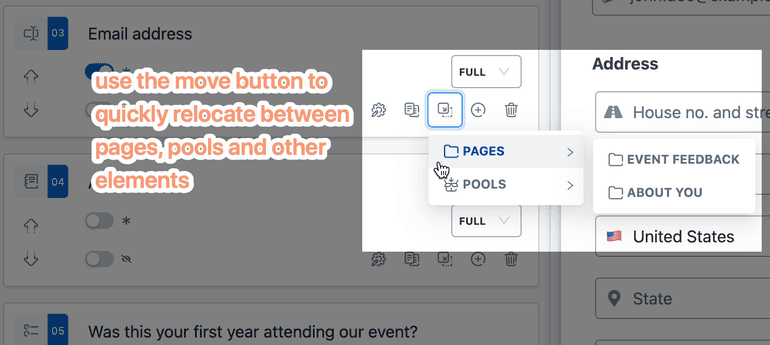
- Move: Quickly relocate this element to another page, pool or inside another element.
- New: Add a new element after this element. This will bring up the Add Element Window.
- Delete: Permanently delete this element. Warning, this cannot be undone.
Rearrange elements
There are several ways to re-arrange elements within the builder interface.
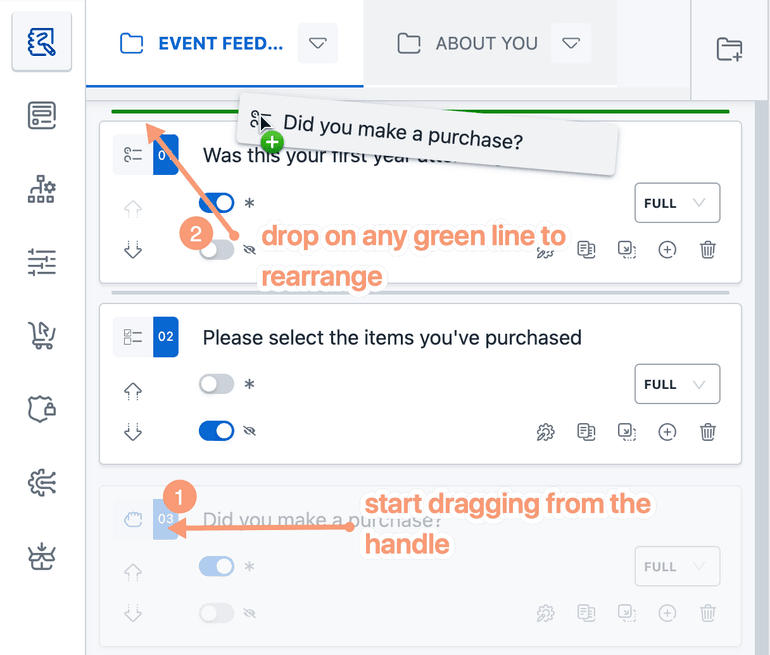
Drag the element by clicking and holding the drag handle as shown in the image. This will pop up droppable zones in the builder interface. Drop anywhere and the element will be re-arranged.
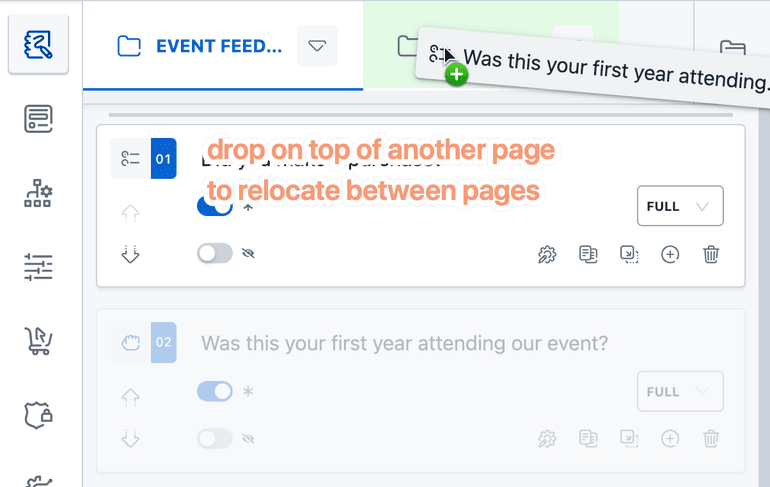
You can also drop the element on top of a page to quickly put the element inside that particular page.
Editing element configuration
Simply click on the configuration button and it will bring up the Config Window. You will see various settings like Appearance, Interface, Attributes, Score, Validation etc.
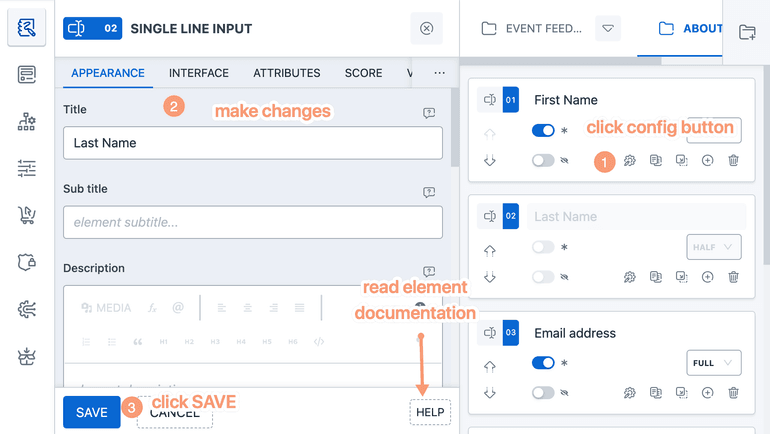
Appearance: This is where element title, subtitle, answer hint and other visual settings goes. Most inputs support Rich Editor.
To learn individual element's configuration, please see the Form Elements section of this guide. The same is also available right within the plugin, if you click the HELP button below the config window.
Nested elements
Some elements in the form builder, allow other elements to be nested inside it. For example, the Row, Column, Group etc.
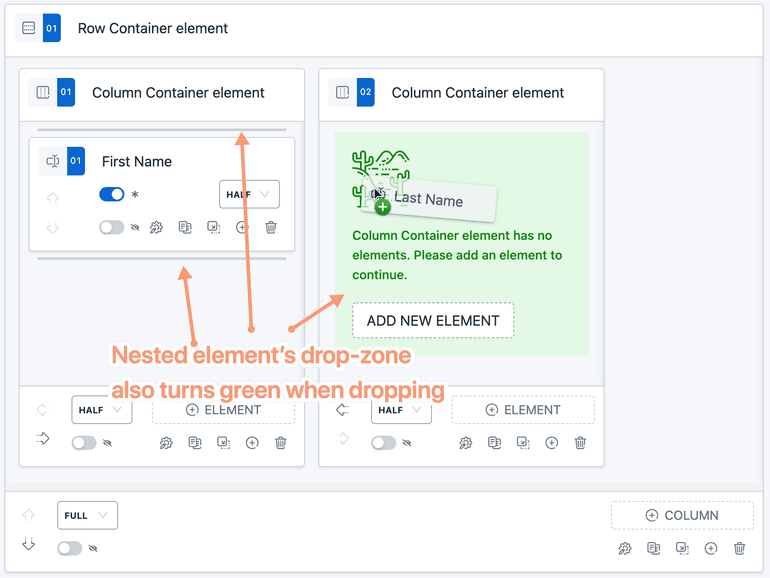
You can very easily move elements to and from with the same drag and drop concept.
Some elements allow only a specific sets of elements to be nested inside it. For example, Row element would allow only Columns inside it. Slider Group will allow only Slider inside it. If you do not see the green drop-zone when trying to drag and drop an element, it is because, the group element does not support the child element.
That's all about elements. Now you know how to create and manage pages and elements with WPEForm. Feel free to browse around to learn advanced setup like conditional logic, quiz etc. And if you have any questions, please use the link below to get in touch.